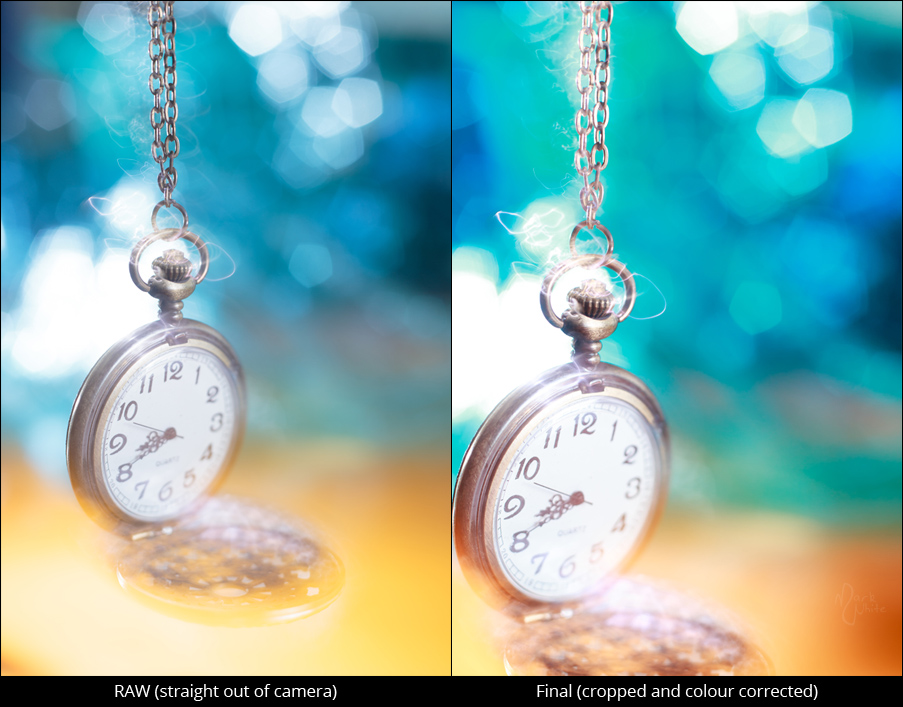
This image shows the RAW file directly out of the camera and the final image. Only Lightroom was used to grade the image, everything else was captured in camera.
This year I had a simple task of taking a photo of Friday 8:43pm for a photography scavenger hunt that my friend held during March. Easy. Well, in the sense that all it needed to be is a clock that showed that time. Simple as it maybe, that simplicity also means a quite uninteresting photo. So I set out to imagine something more intriguing. It still needed to show the time, but it needed some flair. I figured I’d try to capture the essence of time travel in a photo. Or at least a part homage to Dr Who and his infamous pocket watches. Hence the photo dubbed Time to Travel. Unfortunately I didn’t have an intricately patterned clock face, but I think it still works.
With the subject matter and a bit of flare sorted, all that was left was to devise a way to capture the magic of time travel without the aid of Photoshop or the like — as in capture everything in camera — since those were the rules of the scavenger hunt (plus it’s more fun). For this I figured motion, a slow shutter and a couple of strobes would hopefully suffice — or at least give something interesting that I could use. I really didn’t have much time as it would be after work, and the photo needed to be submitted before midnight, so it couldn’t be too elaborate.
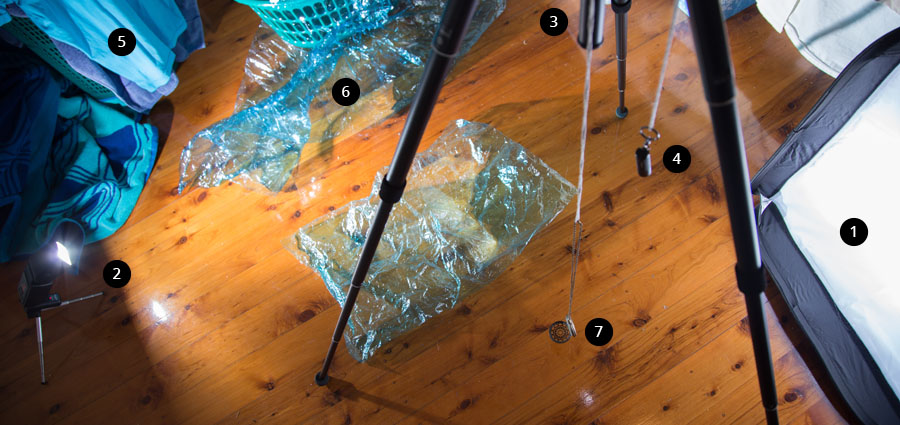
My basic setup consisted of (which you can see in the below photo):
- A small softbox lit by a wireless strobe. This was the primary light to freeze motion and provide uniform light.
- A single strobe firing at crunched up cellophane at the back to provide some bokeh.
- A tripod to suspend the pocket watch and small LED light.
- A small LED light which was used to illuminate the watch during the long exposure.
- Some blue background objects to hide the white cupboard walls (namely a beach towel and shirt).
- Cellophane for bokeh.
- Pocket watch.
- 50mm f/1.8 lens with an extension tube — so I could focus closer (this isn’t shown).
Once all that was setup, I took a few photos to work out how the lighting was working, tweaked it so it was properly exposed and then started experimenting with creating interesting motion blur by moving the watch before taking the photo. Basically what motion would work best for the effect I was going for — science magic.
So if you’ve never used strobes combined with a dark room and another constant light source, it essentially allows for some interesting motion blur effects when combined with a long exposure. Since the strobe lights only fire for a split second, all motion is frozen on the camera’s sensor despite how long the shutter is open — since there’s no more light after the strobe fires. If you then turn on the constant light, you can make smears of people/objects if they move after the strobes have fired, as you now have light entering the camera during the whole exposure, not just when the strobes fire. Depending on your light balance between the strobes and constant light, the effect will change. Object reflectance and light position/quality also drastically changes the light smears. In this photo I was wanting to have bright sharp lines, hence the use of a small point light reflecting off the shiny watch metal (allowed the reflections to over expose and create sharp white lines as appose to muddy smeared colours).
It took a bit of experimenting before I settled on just slightly moving the watch in a circular swing motion. Below are some of the experiments that lead to the final photo.
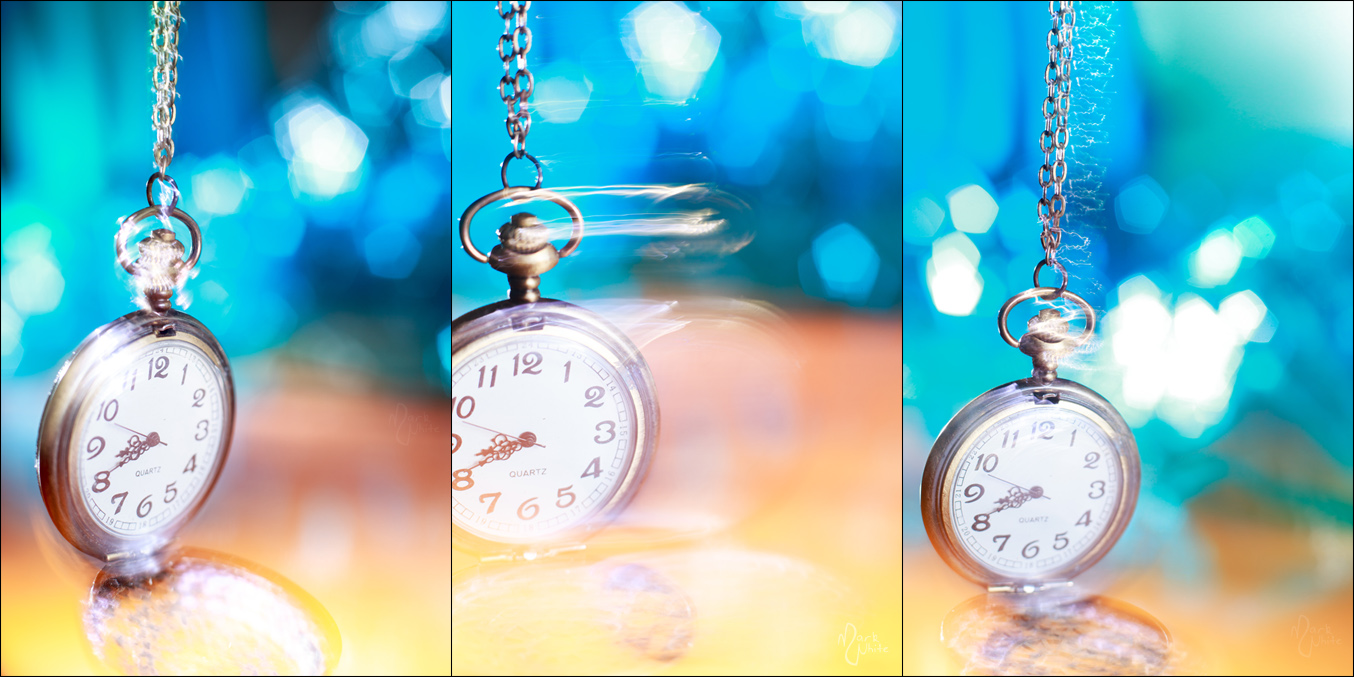
Three variations of the final photo. These were some of the experiments taken while perfecting the best way to move the watch during the exposure.
If you’re interested in other photos using similar techniques see: Secret, Play and Dance.